Mastering Golden Hour Photography
- Bernard Kenol
- Oct 13, 2025
- 4 min read
Updated: Oct 19, 2025
Golden hour photography is a magical time for capturing stunning images. The soft, warm light just after sunrise or before sunset adds a natural glow that can transform ordinary scenes into extraordinary photographs. I’ve spent years exploring this enchanting time of day, and I’m excited to share practical advice that will help you master golden hour photography.
Why Golden Hour Photo Tips Matter
Golden hour is a photographer’s dream. The sun sits low in the sky, casting long shadows and bathing everything in a rich, golden hue. This light is flattering for portraits, landscapes, and product shots alike. But to truly harness its power, you need to understand how to work with it.
Here are some key reasons why golden hour photo tips are essential:
Soft Light: The light is diffused and gentle, reducing harsh shadows and highlights.
Warm Tones: The colour temperature shifts to warm oranges and reds, adding mood and depth.
Dynamic Shadows: Shadows become longer and more interesting, adding texture and dimension.
Versatility: Works well for many photography styles, from candid portraits to dramatic landscapes.
By learning how to anticipate and use these qualities, you can elevate your photography and create images that stand out.

Practical Golden Hour Photo Tips for Stunning Shots
Let’s dive into some actionable tips that will help you make the most of golden hour light. These are the techniques I rely on to get consistent, beautiful results.
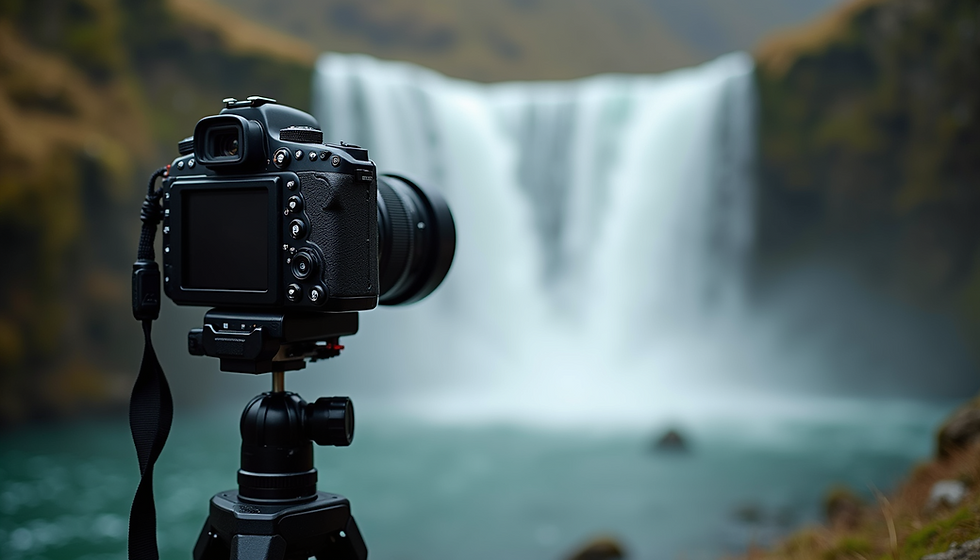
1. Plan Ahead and Scout Locations
Golden hour doesn’t last long - usually about an hour after sunrise or before sunset. To avoid scrambling, plan your shoot in advance. Visit your location beforehand to find the best spots and angles. Use apps or websites to check the exact time of golden hour in your area.
2. Use Manual Settings
Golden hour light changes quickly, so manual control over your camera settings is crucial. Adjust your aperture, shutter speed, and ISO to balance exposure. A wider aperture (like f/2.8 or f/4) helps create a shallow depth of field, making your subject pop against the glowing background.
3. Embrace Backlighting and Silhouettes
Position your subject with the sun behind them to create a halo effect or dramatic silhouette. This technique adds mood and mystery to your photos. Just be mindful of lens flare - sometimes it enhances the image, other times it distracts.
4. Experiment with White Balance
Golden hour light is naturally warm, but you can tweak your white balance settings to enhance or tone down the effect. Try the “shade” or “cloudy” presets for warmer tones, or adjust manually for creative control.
5. Use Reflectors and Diffusers
If you’re shooting portraits or products, a reflector can bounce golden light back onto your subject, filling in shadows. A diffuser softens harsh sunlight if the sun is still too strong. These simple tools can make a big difference.
6. Capture Movement and Emotion
Golden hour is perfect for capturing candid moments. The warm light adds emotion and intimacy to your shots. Encourage your subject to move naturally and interact with the environment for authentic images.
7. Shoot in RAW Format
RAW files retain more image data than JPEGs, giving you greater flexibility in post-processing. You can fine-tune exposure, colour balance, and contrast without losing quality.
By applying these tips, you’ll be well on your way to creating breathtaking photos that truly capture the essence of golden hour.

What is the 20 60 20 Rule in Photography?
The 20 60 20 rule is a simple yet powerful guideline for composing balanced and visually appealing photographs. It divides the frame into three horizontal sections:
Top 20%: Usually the sky or background.
Middle 60%: The main subject or area of interest.
Bottom 20%: Foreground elements or base.
Applying this rule during golden hour helps you position your subject and horizon line effectively. For example, placing the horizon in the top 20% can emphasize foreground details illuminated by the warm light. Alternatively, centring your subject in the middle 60% ensures it remains the focal point.
This rule encourages thoughtful composition, making your images more engaging and harmonious. It’s especially useful when working with the dynamic shadows and highlights of golden hour.
Post-Processing Tips to Enhance Golden Hour Photos
Even the best golden hour shot can benefit from a little post-processing. Here are some tips to polish your images while keeping them natural and vibrant.
1. Adjust Exposure and Contrast
Fine-tune brightness and contrast to bring out details in shadows and highlights. Avoid overdoing it to maintain the soft, dreamy quality of golden hour light.
2. Enhance Warmth and Saturation
Boost the warmth slightly to intensify the golden tones. Increase saturation carefully to enrich colours without making them look artificial.
3. Sharpen Selectively
Apply sharpening to key areas like your subject’s eyes or textured surfaces. This adds clarity without introducing noise.
4. Use Graduated Filters
If the sky is too bright compared to the foreground, use graduated filters in editing software to balance exposure. This technique mimics physical filters used during shooting.
5. Crop for Impact
Crop your image to improve composition and remove distractions. Keep the 20 60 20 rule in mind to maintain balance.
By combining thoughtful shooting with subtle editing, you can create images that truly shine.
Bringing It All Together: Your Next Steps
Mastering golden hour photography is a rewarding journey. With patience and practice, you’ll learn to anticipate the light, compose compelling shots, and create visuals that tell a story. Whether you’re capturing special moments or building a brand identity, these golden hour photo tips will help you deliver professional, high-quality images.
If you want to dive deeper, check out these golden hour photography tips for more expert advice and inspiration.
Remember, the key is to experiment and enjoy the process. The golden hour is nature’s gift to photographers - unwrap it with care and creativity.
Happy shooting!


Comments