Essential Tips for Night Photography Success
- Bernard Kenol
- Nov 4, 2025
- 4 min read
Night photography is a magical realm where light and shadow dance in harmony. When the sun dips below the horizon, the world transforms, offering a canvas full of possibilities. I’ve spent countless evenings chasing the perfect shot, and I’m excited to share some essential tips that will help you master night photography techniques. Whether you’re capturing cityscapes, starry skies, or intimate portraits, these insights will elevate your work and make your images truly shine.
Understanding Your Gear for Night Photography Techniques
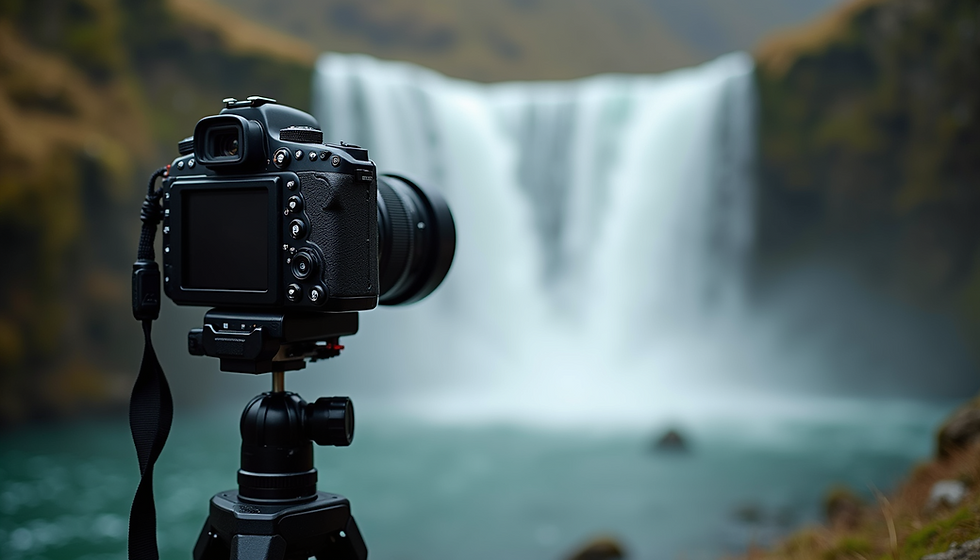
Before diving into the darkness, it’s crucial to get familiar with your camera and equipment. Night photography demands a bit more patience and precision than daytime shooting, so knowing your tools inside out is a game-changer.
Use a sturdy tripod: Long exposures are the backbone of night photography. A tripod keeps your camera steady, preventing blur caused by hand movement.
Manual mode is your friend: Auto settings often struggle in low light. Take control by adjusting aperture, shutter speed, and ISO manually.
Wide aperture lenses: A lens with a wide aperture (f/1.8 or lower) lets in more light, making it easier to capture sharp images in the dark.
Remote shutter release or timer: Pressing the shutter button can cause slight vibrations. Use a remote or set a timer to avoid this.
Getting comfortable with these basics will set you up for success. Don’t hesitate to experiment with your settings to see what works best for your style and environment.

Mastering Exposure and Focus in Low Light
Night photography techniques hinge on mastering exposure and focus. The lack of light can confuse your camera’s autofocus system, so here’s how to tackle it:
Manual focus is often more reliable: Autofocus can hunt in the dark. Switch to manual focus and use live view to zoom in on your subject for precise focusing.
Adjust ISO carefully: Higher ISO settings increase your camera’s sensitivity to light but can introduce noise. Find a balance between brightness and image quality.
Longer shutter speeds: To capture enough light, you’ll often need shutter speeds of several seconds or more. This is where your tripod becomes essential.
Use exposure bracketing: Take multiple shots at different exposures and blend them later for a perfectly balanced image.
For example, when shooting a cityscape, I set my aperture to f/2.8, ISO to 800, and shutter speed to 15 seconds. This combination captures the glowing lights without too much noise or blur.
Creative Composition Ideas for Night Shots
Night photography is not just about technical settings; it’s also about storytelling through composition. Here are some creative ideas to make your night shots stand out:
Incorporate light trails: Capture the movement of car headlights or fireworks by using long exposures. This adds dynamic energy to your photos.
Use reflections: Puddles, wet streets, or glass surfaces can reflect city lights beautifully, doubling the visual impact.
Frame your subject with light sources: Street lamps, neon signs, or candles can create natural frames and add depth.
Play with shadows and silhouettes: Position your subject against a bright background to create striking silhouettes.
Try to scout your location during the day to plan your shots. Knowing where the light sources are and how they interact with the environment will help you compose more compelling images.

Essential Night Photography Tips for Stunning Results
If you’re eager to improve your night shots, here’s a handy collection of night photography tips that I’ve found invaluable:
Scout your location in advance: Familiarity with the scene helps you anticipate the best angles and lighting.
Use a flashlight or headlamp: This helps you see your camera settings and navigate safely.
Shoot in RAW format: RAW files retain more detail and allow for better post-processing adjustments.
Experiment with white balance: Different light sources have varying colours. Adjusting white balance can create warmer or cooler moods.
Be patient and take multiple shots: Night photography often requires trial and error. Don’t rush; enjoy the process.
These tips are practical and easy to apply, whether you’re a beginner or looking to refine your skills.
Post-Processing to Enhance Your Night Images
Editing is where your night photography truly comes to life. Even the best shots can benefit from a little polish. Here’s how I approach post-processing:
Noise reduction: Use software tools to reduce graininess without losing detail.
Adjust exposure and contrast: Brighten shadows and deepen blacks to add drama.
Enhance colours: Boost saturation subtly to make lights pop without looking unnatural.
Sharpen details: Apply selective sharpening to key areas like buildings or stars.
Crop for impact: Tighten your composition to focus attention on the main subject.
Software like Adobe Lightroom or Capture One offers powerful tools tailored for night photography. Remember, the goal is to enhance your image while keeping it authentic.
Embrace the Night and Keep Practising
Night photography techniques open a door to a world full of wonder and creativity. It’s a journey that requires patience, practice, and a willingness to experiment. Each session teaches you something new about light, composition, and your own artistic vision.
So grab your camera, find a quiet spot under the stars or in the heart of a bustling city, and start capturing the night. With these tips in your toolkit, you’re well on your way to creating stunning, professional-quality visuals that tell powerful stories.
Happy shooting!


Comments